LA-316 direct reading precision concrete air content tester

  1. When using, pay attention to discharge the pressure in the measuring bowl first and then discharge the pressure in the air chamber to not cause the cement slurry to flow back into the air chamber and cause damage to the instrument.
  2. Be careful not to damage the edge of the measuring bowl during use to avoid air leakage.
  3. After each use, be sure to rinse the adhering concrete mixture inside and outside of the measuring bowl with water, especially the water injection port to make it unblocked. Then wipe clean with cotton yarn and place it.

Additional information

Product details:

Instrument maintenance

  1. When using, pay attention to discharge the pressure in the measuring bowl first and then discharge the pressure in the air chamber to not cause the cement slurry to flow back into the air chamber and cause damage to the instrument.
  2. Be careful not to damage the edge of the measuring bowl during use to avoid air leakage.
  3. After each use, be sure to rinse the adhering concrete mixture inside and outside of the measuring bowl with water, especially the water injection port to make it unblocked. Then wipe clean with cotton yarn and place it.
  4. After use, return the pointer of the watch to the vertically downward position.
  5. Each time you loosen the fine-tuning vent, make the hand slowly return to the vertically downward position to avoid the rapid rotation of the hand and the copper nail on the lower right.
  6. When transporting, pay attention to the head of the meter must be transported vertically. When the transport is inconvenient, remove the top cover and transport it carefully. When transporting in plateau areas, the pointer of the watch is in the vertically downward position when going up the mountain, and when going down the mountain, the pointer of the watch is set to the upward position with the hand pump.

NOTICE

Please note to users: Please check and accept in time after the goods arrive.

Acceptance method: Please check and accept according to the water calibration method in the instruction manual

The time limit for filing an objection: two weeks

If you have any questions about the acceptance of the water calibration method, please contact our company in time. Please do not do the concrete test before the problem is solved.

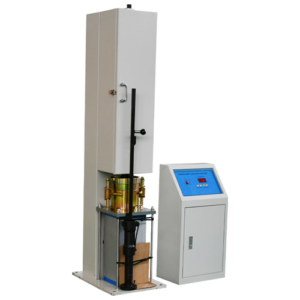
This instrument (Figure 1) uses the air pressure method to determine the air content in concrete. The measurement is carried out by water injection, and the operation is simple and accurate to read the air content value directly from the dial. The applicable regulations are in full compliance with the “Common Concrete Mixture Test Method” GB/T50080-2016, GJ55-2011, Highway Engineering Cement Concrete Regulations JTJ053-94.

structure

  1. Measuring bowl: using special cast aluminum, precision machining on the inner wall, lightweight, and anti-corrosion, the volume is 7000ml
  2. Upper cover: dial, air chamber, drain (air) valve, fine-tuning valve, pressure balance valve, hand pump, water injection valve, clip
  3. Accessories: (as shown in Figure 2) scraper, tamping rod, water injector, aluminum tube, U-shaped tube, measuring cylinder.

OPERATION

  1. The concrete mixture is loaded in 3 layers, and the height of each layer after tamping is about 1/3 of the container height. After each layer is loaded, it is evenly inserted from the center of the edge 25 times, and the ramming rod should be inserted through the height of the layer. And then hit 10-15 times along the outer wall of the measuring bowl with a rubber hammer to fill up the hole left by the ram. Avoid overfilling the last layer.
  2. Place the instrument horizontally, use a scraper to scrape off the excess concrete mixture to make the surface smooth and free of bubbles, wipe the edge of the measuring bowl with a clean cloth, cover the top cover, and press the 4 clamps respectively.

    Note: During the water injection measurement, the error caused by the inconsistency between the surface of the loaded concrete mixture and the edge pin of the measuring bowl is small and can be ignored.

  1. Open the water injection valve, open the exhaust valve, and use a water injector to inject water from the water injection port. When the water flows out smoothly from the exhaust port, close the water injection valve while injecting water and then closing the exhaust valve and the micro regulator valve.
  2. Unscrew the hand pump, inflate and pressurize the pointer to a position slightly above the initial pressure point. After 4-5 seconds, tap the outside of the dial with your fingers to make the pointer point to the initial pressure point steadily. When the pointer exceeds toomuch, you can use a fine-tuning valve with a hand pump to stabilize the pointer at the initial pressure point.Initial pressure point: Read the black dial when measuring water injection. The initial pressure point is below 0 o’clock () on the lower right of the dial. Press the balance to handle steadily to make the compressed air in the air chamber flow into the measuring bowl, 4~ After 5 seconds, press the balance valve handle again, and gently flick the edge of the dial with your finger to stabilize the pointer. At this time, what the pointer indicates is the gas content to be measured.    Example: When the hand of the meter is at “4” on the dial during water injection measurement, it means that the air content is 4%.
    1. Open the exhaust valve to discharge the pressure in the measuring bowl, loosen the clamp, pour out the concrete in the measuring bowl, and clean it up. Then loosen the fine-tuning valve to exhaust the gas in the air chamber. The air content of the next set of concrete can be determined according to the above steps.

    Note: After completing the experiment, first open the exhaust valve to release the pressure in the measuring bowl. Do not open the pressure balance valve and fine-tuning valve above the instrument first, to avoid the pressure in the measuring bowl higher than the pressure in the air chamber, causing water in the air chamber and pressure gauge. If water enters the air chamber and pressure gauge due to human error, the instrument will no longer be covered by the free warranty.

    1. After use, loosen the fine-tuning valve, discharge the pressure air in the air chamber, and return the needle to the vertically downward position, otherwise, it will shorten the service life of the instrument and affect the measurement accuracy. Rinse the concrete inside and outside of the water injection port and the measuring bowl with water, and then wipe it with oil cotton yarn and place it. The inner wall of the measuring bowl adheres to concrete to make the volume smaller, which will affect the accuracy of the measured value.

        Note: Be sure to discharge the pressure in the measuring bowl first, and then discharge the pressure in the air chamber to avoid backflow of the cement slurry in the measuring bowl into the air inlet chamber, which may damage the instrument.
    CALIBRATION METHOD

    1. Fill the measuring bowl with water and place it on the water platform. Use a slender cotton swab to drive out the bubbles on the inner wall of the measuring bowl, screw the calibration aluminum tube to the inner side of the upper cover water inlet, and close the upper cover to fasten the clamp.
    2. Open the water injection valve and exhaust valve, use a water injector to inject water from the water injection port until the water flows out smoothly from the exhaust port, close the water injection valve while filling water, and then close the exhaust valve and the micro regulator valve.
    3. Pull out the hand pump, inflate and pressurize so that the pointer points to the initial pressure point of the black dial (ie the position “3” below 0 o’clock on the lower right of the dial).
    4. Press the balance valve handle, the pointer should point to “0”. If the pointer deviates from “0”, repeat the second and third operations to stabilize the pointer to “0”. (For instruments that have been used for a long time, considering the possible changes in the volume of the measuring bowl, give up the part that deviates from the “0” point before and after the initial pressure point, and re-determine the new initial pressure point position by pressing with a hand pump before calibrating ).
    5. Screw the U-shaped pipe to the water injection valve, open the water injection valve, take water from the U-shaped pipe port with a measuring cylinder (lightly press the pressure balance valve) and fill the measuring cylinder with water (if enough water cannot be released, close the water injection valve, Then press the balance valve handle to relieve the pressure in the bowl, and then open the water intake valve to release enough water.) Equal to 5% of the volume of the measuring bowl (equivalent to 350ml of water), close the water injection valve.
    6. Loosen the exhaust valve to balance the pressure in the measuring bowl with the atmosphere before closing it, and loosen the fine-tuning valve to exhaust the pressure in the air chamber before closing. Press with a hand pump to make the pointer point to the initial pressure point (3 below 0), then steadily lower the balance valve handle, gently flick the outside of the dial with your fingers to stabilize the pointer. At this time, the value pointed by the pointer is the same as the percentage value of the volume of the water taken out, and the reading is accurate.
    7. If two or more tests show that the reading of the pressure gauge is not 5%, say 2%, reset the pointer by rotating the recalibration screw on the pointer of the pressure gauge.
    8. When the pressure gauge reading reaches 5% correctly in the first calibration, pump out water, in the same way, to check the results under 10%, 15%, 20%, etc.

Ask For A Quick Quote

We will contact you within 1 working day, please pay attention to the email with the suffix “@gtj-test.com”